You’ve finished your lettuce or basil harvest and you’re ready to start again. Hold on! Before you put in new seeds, there’s a step you can’t skip: the system reset.
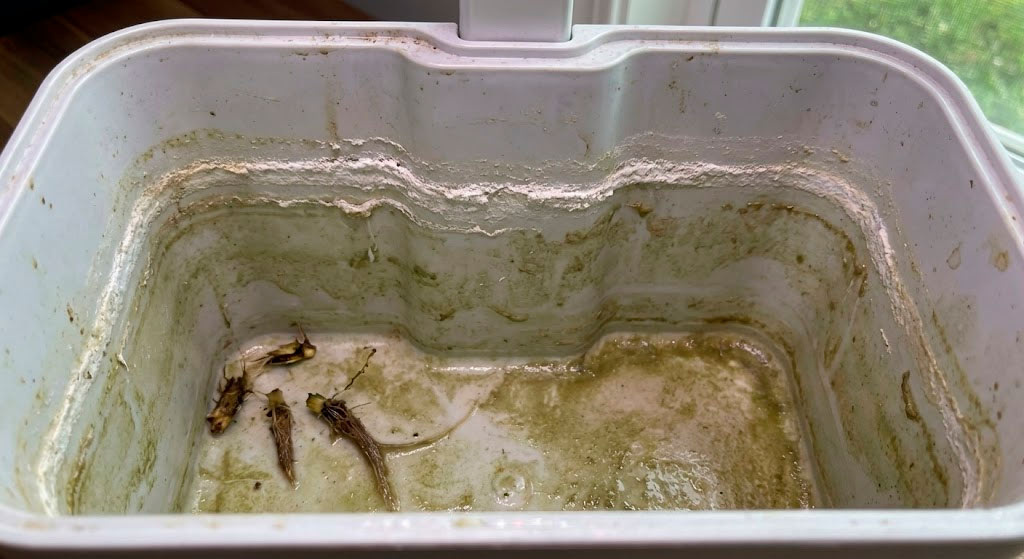
Cleaning between grows is the best-kept secret for healthy plants. With use, the tank builds up invisible enemies: root debris, mineral salts, and the dreaded biofilm. If you don’t get rid of them, your next grow starts at a disadvantage.
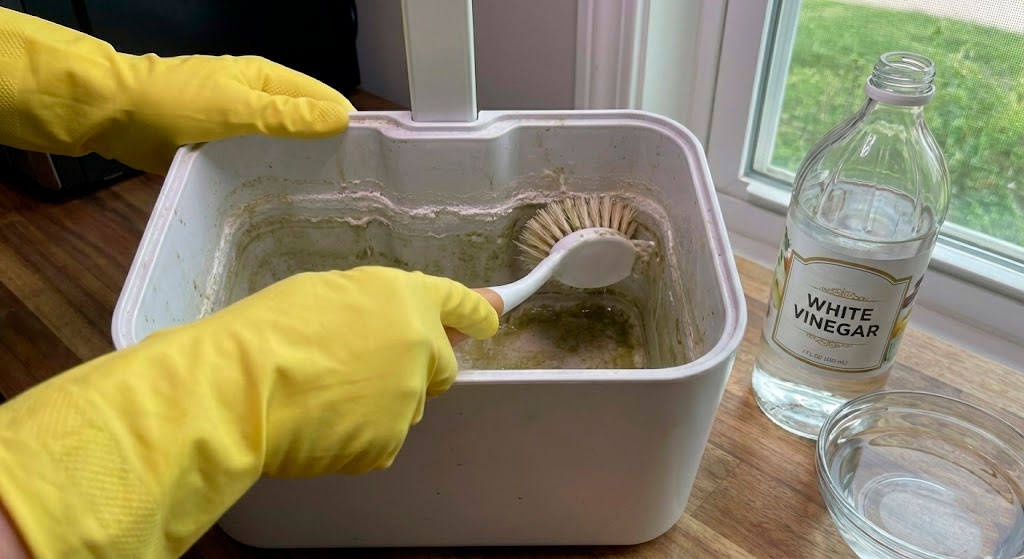
Here’s how to get your SmartGarden looking like new in under 20 minutes.
Note: This article includes AI-generated images and illustrations to enhance your reading experience.
Why is cleaning non-negotiable?
Even if you drain the water, residues remain on the walls and corners that can ruin your next planting:
- Biofilm: That slippery, slimy film that forms on the plastic. It’s a bacterial colony that shelters pathogens and is hard to eliminate once it sets in.
- Mineral salts: The hard white crust that sticks to the edges.
- Organic debris: Small pieces of old roots that rot and attract fungi.
If you skip the cleaning, you risk bad odors, unstable pH, and root disease (Pythium) from the very first week of the new grow.
Golden rule: zero dish soap
A critical warning before you start: never use dish soap, hand soap, or strong bleach. Chemical residues are very difficult to rinse out completely and are toxic to new roots.
All you need is:
- Warm water
- White vinegar (the hydroponic grower’s best friend)
- An old toothbrush or soft sponge, dedicated exclusively to this task
- A clean cloth
Step by step: the deep clean
Follow these 5 steps to guarantee a clean start:
1. Full disassembly Unplug the unit. Remove the lid, the pods, and detach the light arm if your model allows it. Drain all the old solution — you can use it to water soil plants, they’ll love it.
2. The tank and lid Take the tank to the sink and gently scrub the inner walls with warm water and the brush. If you see white mineral deposits or salt buildup, use a 50/50 mix of water and white vinegar. The acid dissolves the minerals without damaging the plastic. Pay special attention to the underside of the lid — that’s where mold and algae love to hide.
3. The water pump
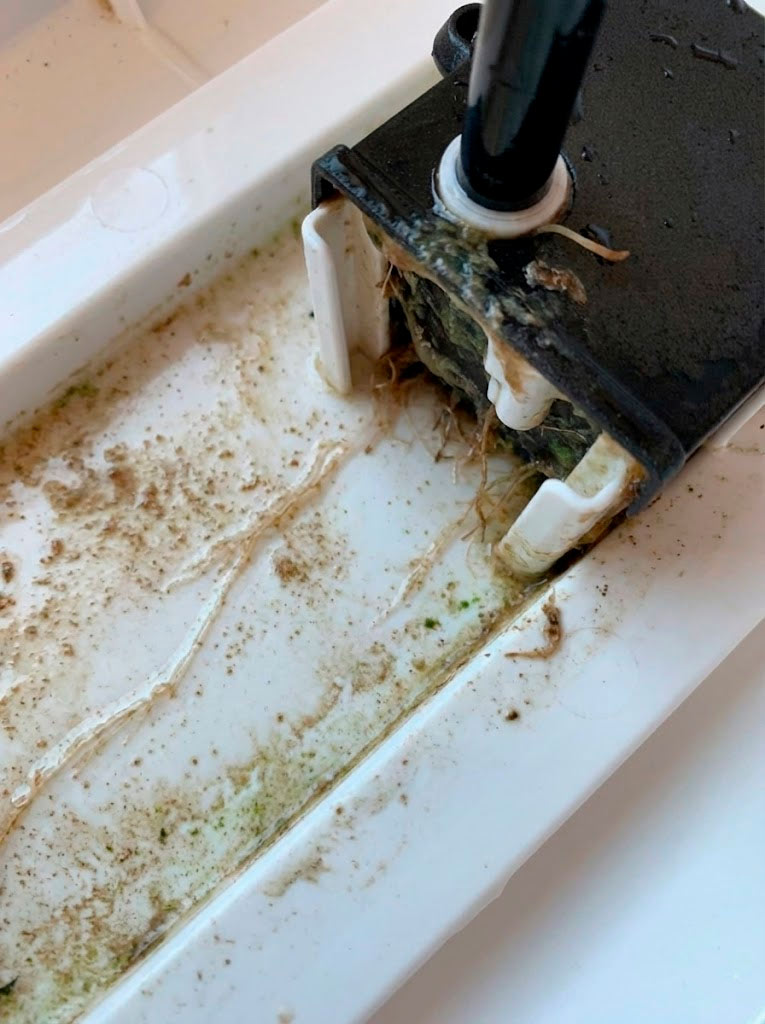
This is the component people most often forget to clean, and it’s usually the culprit behind noise or reduced flow. Since every model has a different design, follow these general steps:
- Water intake: Check the mesh or sponge filter where the pump draws water in. This is where roots and substrate debris love to get stuck.
- If the pump is disassemblable: Consult your manual to open the cover and clean the impeller and its housing.
- If the pump is sealed or integrated: Don’t try to force it open. The best way to clean it is to fill it with clean water and run it for a few minutes so the flow flushes out internal buildup.
- Make sure no vinegar residue remains inside the mechanism before reinstalling it.
4. Pods and sponges The plastic pods are reusable — scrub them with warm water and a brush to remove algae residue. The sponges, however, go in the trash. They’re single-use: trying to reuse them invites fungal problems. Use fresh sponges for every grow.
5. Drying and reassembly Before putting everything back together, dry the exterior and electrical contacts thoroughly. If you’re not planting right away, let everything air-dry completely before storing. Storing a damp system in a dark box is an open invitation for fungi.
Pro tip for tough cases
If the previous grow had fungal issues, severe algae, or bad odors, do a gentle sterilization:
- Fill the tank with warm water and add 1 cup of white vinegar.
- Turn on the pump and let the mixture circulate for 30 minutes.
- Drain and rinse thoroughly with clean water.
Cleaning your SmartGarden is like washing your dishes before serving a new meal: essential and hygienic. With water, vinegar, and a few minutes of effort, you ensure your new seeds have a clean home, stable pH, and everything they need to grow strong.