If you have a hydroponic system (like an AeroGarden), you probably started with the sponges that came pre-seeded. But you quickly discover two things: they’re expensive and the variety is very limited.
Learning to germinate your own seeds in blank sponges is the definitive step toward growing freedom. Not only is it much more affordable, but it lets you choose exactly which variety of tomato, lettuce, or basil you want, with guaranteed freshness and quality. Here’s how to do it, step by step.
Note: This article includes AI-generated images and illustrations to enhance your reading experience.
1. Why germinate your own seeds
Using your own seeds has clear advantages over commercial kits:
- Greater freshness: Pre-seeded kits sometimes sit in warehouses for months, which reduces seed viability. When you buy your own seed packets, you control the packaging date.
- Better value: A pack of 50 blank sponges and a seed packet cost a fraction of what branded kits do.
- Endless variety: You’re not limited to “Genovese Basil.” Want lemon basil, purple lettuce, or yellow tomatoes? If you have the seed, you can grow it.
2. Which seeds work best in hydroponic sponges
While almost anything can grow hydroponically, some species are especially well-suited for this medium:
- Aromatic herbs: Basil, cilantro, parsley, dill, and mint.
- Leafy greens: Lettuce (all kinds), kale, arugula, Swiss chard, and spinach.
- Small fruiting plants: Cherry tomatoes (dwarf or “micro” varieties), hot peppers, and strawberries — the latter require more patience.
- Edible flowers: Calendula, violas, and pansies.
3. Materials you’ll need
You don’t need a lab — just the basics:
- Hydroponic sponges (branded or generic; make sure they fit your pods)
- Quality seeds with a valid expiration date
- Reusable plastic pods/baskets
- Clear plastic domes
- Precision tweezers (very helpful for small seeds)
- Stickers to cover the sponge surface
4. How to choose and prepare your seeds
Success starts at the store:
- Freshness: Always check the expiration date. Old seeds have very low germination rates and waste your time and sponges.
- How many seeds per sponge:
- Lettuce and herbs: 3 to 5 seeds
- Tomatoes and peppers: 1 or 2 seeds (then keep only the strongest one)
5. Where to place the sponges to start germination
You have two options:
Option A — Direct method in the system: Place the seed in the damp sponge, set it in the pod, and put it directly in the system with water. It’s convenient, but it takes up space in your machine from day one.
Option B — Tray method (recommended): More efficient and controlled.
- Germinate the seeds in a sprouting tray or in a container with damp paper towels.
- Once the seed sprouts and has a visible root of a few millimeters, use tweezers carefully.
- Place the sprout inside the hole of the damp sponge, with the tiny root pointing downward.
Advantage: You only use sponges on seeds that have already germinated, avoiding wasted material on failed seeds.
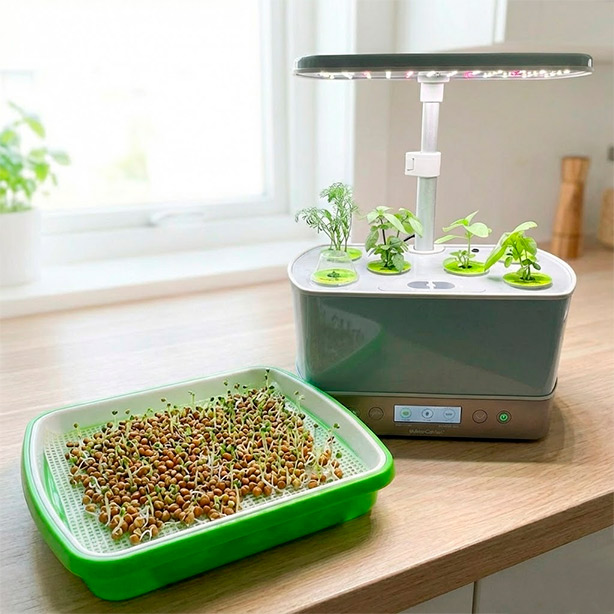
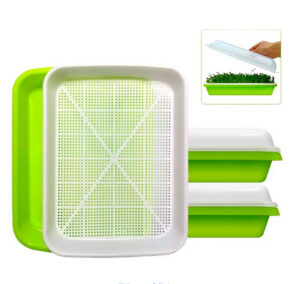
2-Pack Seed Sprouter Tray BPA Free PP Soil-Free Big Capacity Healthy
6. Moisture control: the secret to success
The seed needs constant moisture, but it shouldn’t be waterlogged.
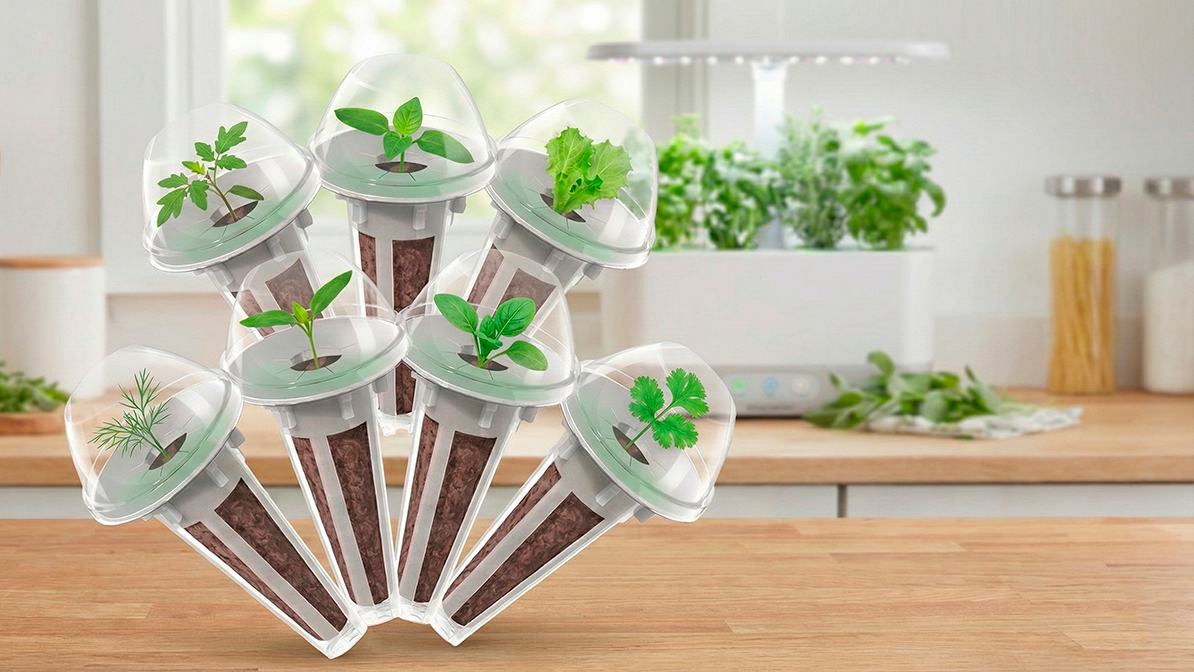
- Use the domes: Always place the clear covers over each pod. They create a microclimate that keeps the sponge hydrated without constant watering.
- The anti-algae sticker is a must: Place an opaque adhesive label (usually donut-shaped) over the surface of the sponge, leaving only the center hole exposed. If the grow light hits the damp sponge, algae will grow and compete with your plant for nutrients and oxygen.
7. Light: yes or no during germination?
- Before sprouting: Most seeds don’t need light to germinate — just warmth and constant moisture.
- As soon as the first sprout appears: They need light immediately.
- Intensity: Use the lowest setting at first, or the “germination mode” if your system has one. Too much light can burn tender seedlings or dry out the sponge too quickly. Keep the lamp at its lowest position, close to the domes.
8. Germination times (at 68–75 °F)
| Species | Estimated time |
|---|---|
| Arugula / Lettuce | 2 to 4 days |
| Basil / Kale | 4 to 7 days |
| Tomatoes / Peppers | 6 to 12 days |
| Strawberries | 14 to 25 days |
| Parsley / Cilantro | up to 21 days* |
Tip: Soaking these seeds in warm water for 24 hours before planting significantly speeds up the process.
9. Common mistakes
- Forgetting to remove the dome: When the seedling touches the dome’s ceiling, take it off immediately. If you leave it on, the leaves will rot from excess condensation or burn from the magnifying effect.
- Too many seeds: Putting 10 tomato seeds in one sponge causes them to compete with each other and none of them will grow strong.
- Pushing the seed too deep: If you push it all the way to the bottom, it will drown or won’t have the strength to push through. It should sit just a few millimeters below the surface.
10. When to add nutrients for the first time
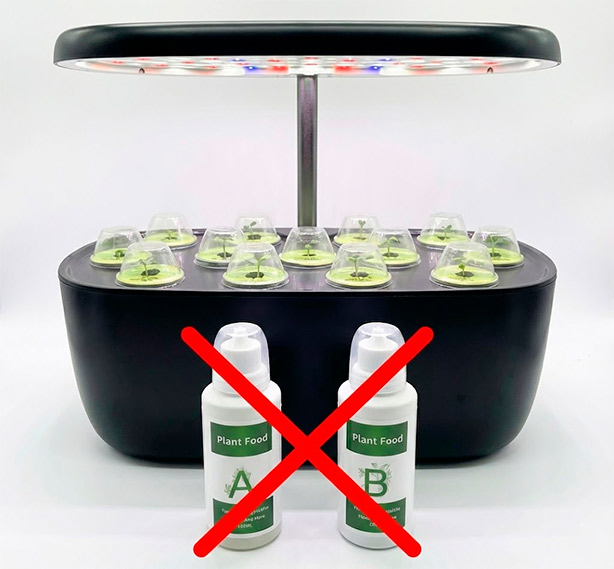
This is mistake #1 for beginners. During germination, the tank should have water only. The seed has its own nutrient reserves (in the cotyledons) for the first few days. Adding fertilizer from day one will burn the developing roots.
The rule: Add the first (light) dose of nutrients only when the plant has its first pair of true leaves — the ones that appear after the first two small, round initial leaves.
11. How to tell if germination was successful
Everything is on track when:
- You see a white or greenish stem standing upright out of the sponge.
- The leaves are opening up and reaching toward the light.
- When you lift the sponge, a white root is peeking out from the bottom, reaching for the water in the tank.
If you have questions about how your seedlings are progressing, you can use HydroScan: upload a photo of your sponges along with any observations or questions about what you’re seeing, and our AI will analyze your system’s condition and give you a personalized response to ensure strong growth from day one.
Frequently Asked Questions
What if two or more seeds germinate? Do some “thinning”: pick the strongest plant and cut the others with small scissors right at the sponge surface. Don’t pull them out — you’d damage the roots of the one you want to keep. The golden rule in hydroponics is one plant per sponge (exception: you can keep 2 or 3 stems of herbs like cilantro or parsley).
Can sponges be reused? It’s not recommended. Old roots get trapped inside and as they decay, they generate fungi (such as Pythium) that can kill your new plants. Sponges are cheap — it’s best to use new ones.
Why do some seeds fail to germinate? The three most common causes are: old or expired seeds, ambient temperature below 64 °F, and lack of consistent moisture in the sponge.